Prerequisities
Use this to setup a base project:
Django - Blog App Tutorial (Python)
Troubleshooting
Are you encountering the following error: AttributeError: module 'PIL.Image' has no attribute 'ANTIALIAS'?
Try downgrading Pillow:
pip uninstall pillow
pip install Pillow==9.5.0
Step-By-Step Tutorial
Install Dependencies
pip install pillow django-imagekit
Update Settings
Edit mysite/settings.py and add these lines to it:
INSTALLED_APPS = [
    'django.contrib.admin',
    'django.contrib.auth',
    'django.contrib.contenttypes',
    'django.contrib.sessions',
    'django.contrib.messages',
    'django.contrib.staticfiles',
    'imagekit', # here
    'blog'
]

# here
MEDIA_URL = 'media/'
MEDIA_ROOT = BASE_DIR / 'media'
MEDIA_URLis the URL prefix, e.g., images will be served as follows: 'mysite.com/media/images/image.png'.MEDIA_ROOTis the physical location for these media files.
Configure Media File Serving
Edit mysite/urls.py and add these lines to it:
from django.contrib import admin
from django.urls import include, path
from django.conf.urls.static import static # here
from mysite import settings # here

urlpatterns = [
    path('blog/', include('blog.urls')),
    path('admin/', admin.site.urls),
]

# here:
urlpatterns += static(settings.MEDIA_URL, document_root=settings.MEDIA_ROOT)
The static() function allows us to serve media files during development. In production you would typically use something like Nginx to serve the files.
Update Post Model
Edit blog/models.py and add these lines to the Post model:
from django.db import models
from imagekit.models import ImageSpecField # here
from pilkit.processors import Thumbnail # here


class Post(models.Model):
    title = models.CharField(max_length=255, blank=False, default='')
    body = models.TextField(blank=False, default='')
    slug = models.SlugField(max_length=255, blank=False, unique=True)
    image = models.ImageField(upload_to='images', default='') # here
    # here:
    image_thumbnail = ImageSpecField(source='image',
                                     processors=[Thumbnail(200, 100)],
                                     format='JPEG',
                                     options={'quality': 60})

    def __str__(self):
        return self.title
-
ImageFieldallows users to upload images. In this case, we store the images in the media folder at the project root (make sure to add the media folder to your gitignore file). You could also store the images in a cloud storage, such as Amazon S3. -
ImageSpecFieldis used for generating thumbnails from the original image. Thumbnails are generated (and cached) the first time they are requested, such as when you visit a page where theimage_thumbnailfield is used.
Run Migrations
python manage.py makemigrations
python manage.py migrate
Update Post Detail Template
Edit templates/blog/post_detail.html and add these lines to it:
<div class="post">
    <h1>{{ post.title }}</h1>
    <div class="body">{{ post.body }}</div>
    <!-- start -->
    {% if post.image %}
        <img src="{{ post.image_thumbnail.url }}">
        <img src="{{ post.image.url }}">
    {% endif %}
    <!-- end -->
</div>
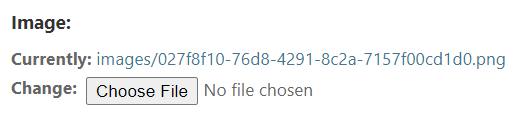
Upload An Image
Visit /admin/ and add an image to the default blog item:
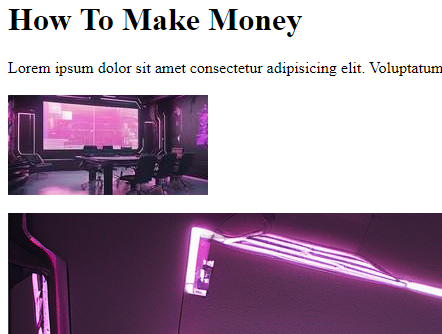
Result
Visit /blog/how-to-make-money/ and you should see the thumbnail and the original image below it:
The thumbnail is served from the media/CACHE folder:
media/CACHE/images/images/21da-JZerh...jpg
The original image is served from the media/images folder:
media/images/orig.png